
Thank you for coming to my talk at Food Blogger Connect and for coming to visit this page for further information.
It was quite a lot to take in, wasn’t it?
Hopefully, this summary will enable you to work through the process yourself.
Why migrate to Self Hosted WordPress
With WordPress.com you get:
- Free hosting.
- No worries about updates and conflicts.
- Use your own URL (for a few dollars a year).
- Customise the CSS style sheet (for a few dollars a year).
But you can’t:
- Install themes and plugins of your choice.
- Take advertising (it’s against their T&Cs).
- Have complete ownership of your blog.
What to look for with Web Hosting
- Runs WordPress.
- Uptime – do they guarantee 99.9% uptime.
- Helpful, friendly and available tech support.
- Price.
- Ask for Recommendations.
I use Tsohost because they have all the above and I’ve been very impressed with their technical support. Their web hosting prices start at £15pa and if you use the discount code calliaweb you will get a 10% discount
Choosing a Domain Name
Make your domain name as close as possible to your blog title to avoid any confusion with your readers. Try to avoid hyphens and making the URL too long.
Deciding whether to choose .com, .co.uk or .me domain suffix is a personal choice, subject to availability.
Installing WordPress
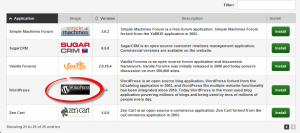
Most web hosts have a one-click install. Some will ask you for user account details and others will install WordPress to create a default username, usually admin, and password.
If the installer creates an account for you make note of the login details.
In no time at all, you will be able to login to http://yourdomainname.com/wp-admin
The first thing to do once you have logged in is to go to the dashboard and check for updates. Usually, the one-click install does install the latest version but sometimes it may be the last release.
Admin User
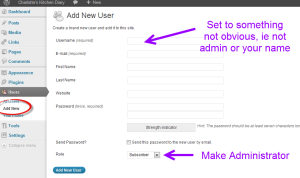
If the one-click installer creates a user called admin for you the second thing you should do is create a new user account with an administrator role.
In your dashboard go to Users -> Add New User. Set your username to something not obvious – i.e. not your name. Enter your first name and password and make sure you set the Role to Administrator.
Click Add New User and then select the new user in the list and click edit. Now change the Display Name Publicly As to your name.
This is to try and keep your username secret for security reasons.
Now logout and login in with the new account you have created. Make sure you have administrator privileges and then delete the old account.
Permalinks
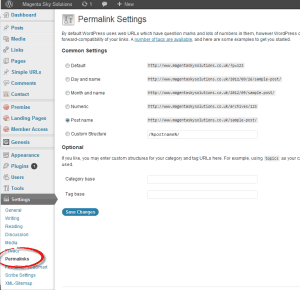
It is very important to set the Permalinks (Dashboard -> Settings -> Permalinks) to be exactly the same as your current blog. This way when a visitor is redirected from WordPress.com to your new website they will arrive at the correct page.
Other General Settings
- Enter your site title and tag line.
- Make sure the email address is a valid one.
- Change the WordPress Address and Site Address to use www if you plan on using the www prefix.
- Make sure the timezone is correct (if not correct it can cause issues with scheduling posts).
Privacy Setting
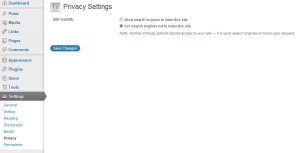
Whilst you are working on your new blog you don’t want search engines to pick it up and think it is duplicate content to your WordPress.com blog. Therefore set the Privacy Setting to Hide From Search Engines.
Yes, remember to switch it back after your new site goes live!
Choosing a Theme
You could start by using the same theme you already use, so your readers will know they are in the right place. But I bet that one of the reasons you decided to move to self-hosted is because you wanted a new theme.
So what should you look for in a theme?
- It looks how you want it or is easily customisable.
- Provides the functionality that you want, e.g. a widgetised home page.
- Compatible with the current version of WordPress.
- Well coded (robust and secure).
- SEO Friendly.
- Preferably with tech support.
- Ideally mobile responsive so it displays well on mobiles devices.
Premium themes are around £50 and well worth it as an investment in your blog.
Personally I like the StudioPress themes which are based on the Genesis Framework. Whilst they don’t have a specific Food Blog theme you might find something you like from their selection.
A theme I know is popular with Food Bloggers is the Atahualpa theme as it is very customisable but it doesn’t use the WordPress native menus and the site structure is based around tables, so I don’t recommend it.
Alternatively if you Google WordPress Food Blog Theme you will see a whole selection of themes.
Once you have installed your theme don’t spend a lot of time setting it all up and making it pretty, until after you’ve imported all your data. The reason for this? When doing my first site migration I ended up wiping the site 3 times…..
Exporting and Importing your Posts, Pages and Comments
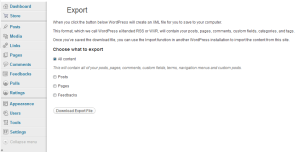
In your WordPress.com dashboard go to Tools -> Export and create an XML file containing all your posts, pages and comments.
If you don’t have too many posts export everything in one file. If you have a lot of posts then export a series of the files based on a few months at a time.
Now on your new website go to your dashboard and Tools -> Import. You’ll need to install the plugin first, click Activate and then Run.
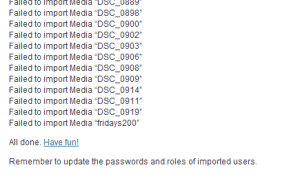
Upload the XML file and then you will be given the option to import the users or to assign the posts to an existing user, so select your username.
Wait for it to run. If you get the “All Done. Have Fun!” message then great!
But if don’t get the cheery “All Done. Have Fun!” then you still have work to do.
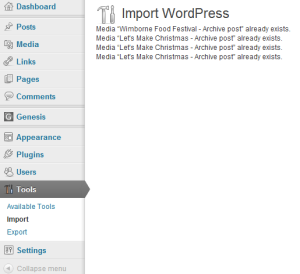
There are a few reasons why the import will not succeed – usually based around the script running out of memory. There’s lot of techy things you could do but the easiest is just to go back to your WordPress.com website and export the data in smaller chunks. If you still have difficulty you will have to speak to your web hosting’s technical support.
When you try to import data that has already been imported you will get some error messages but it doesn’t adversely affect the data imported.
When you think all your data is import check the number of posts, pages, comments, tags and categories tallies up with your old site.
Images
There is a handy little tick-box on the import screen which says “Download and import file attachments”. In my experience, it doesn’t do anything. It does not import your images. If you look at your posts you will see your images but they are being pulled from your WordPress.com website.
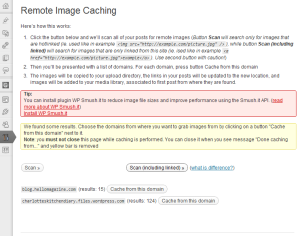
Fortunately, there is a very handy plugin called Cache Images by Matt Mullenweg. It scans your posts looking for remote images. You can then select to cache the images from your WordPress.com domain.
Do note though, that it will only cache the image at the size it is in the post, not the original full size, so make sure you have an offline copy of the original image.
Now do a few random checks on your images in posts. Is the source URL a local URL? If you link your images make sure the link is working correctly. If you find any that aren’t working properly then you’ll need to do a complete manual check.
(Aside: why link to the full-size version of the image? Makes it easier for it to be copied).
Blogroll
To import your blogroll go to Tools -> Import -> Blogroll and install the plugin. Activate and click run and then enter the URL to your WordPress.com blogroll, which will be something like http://yourblogtitle.wordpress.com/wp-links-opml.php. Click Import OPML and its done.
Subscribers
If you have used FeedBurner to manage your feed then all you need to do is edit the original feed details in your FeedBurner account to http://yourdomainname.com/feed. Assuming you’ve then used your FeedBurner URL anywhere you’ve needed to give your feed details, then you don’t need to do anything more.
If you have used the WordPress.com subscription service then I’m afraid I don’t know any easy way to transfer the subscribers. The forum suggests asking a Happiness Engineer and I believe they have helped people but its not something I have personally done.
If you can’t transfer your subscribers you will need to publish a few posts on your WordPress.com website asking people to resubscribe. You will lose a few subscribers, but these will be people who are no longer engaged with your blog.
Then you will need to update everywhere you have had to give your feed details – such as Networked Blogs.
Redirect Your WordPress.com Website
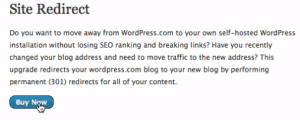
Once you have everything as you want it and are ready to redirect your WordPress.com website to your new blog then login to WordPress.com, click Store and then Site Redirect. It costs $13pa and all you need to do is enter your new website’s URL.
Alternatives to Doing It Yourself
- WordPress.com Guided Transfer is just $129 and this is excellent value. However you have to have your hosting at one of their partners, all of which are US based.
- Ask me.
Recommended Plugins
- JetPack – provides many of the functions available by default in WordPress.com
- BlogVault – daily backups with one click restore. $9 per month
- Google XML Sitemap – generates a sitemap and submits it to the search engines.
- Digg Digg – Social media sharing icons
- nRelate Most Popular & nRelate Related Content – lists most popular posts and related content.
Good luck and enjoy!
If you have any questions please contact me.


Leave a Reply